Stepwise Replacement: Whirlpool Washer Soap Dispenser Tube
Dealing with home appliances requires a thoughtful approach. If your washer’s dispenser tube is leaking or clogged, it’s time to restore efficiency. This process is quite straightforward even for those without repair experience. Follow the structured guidance below to confidently proceed, discovering nuances along the way and avoiding common errors that can add frustration to an otherwise simple fix.
| Phase | What Happens |
|---|---|
Preparation InsightsTools and EnvironmentGathering materials is the first step toward success. Usually, it means a screwdriver, pliers, and towels for spills. Find a clear space with enough lighting. Double-check your Whirlpool appliance model. This guarantees that the replacement tube will match perfectly and simplifies the rest of the work. | All About SafetyMinimizing RisksTurn off power and water connections before starting. Quick action here prevents electric shock and water mess. Even experienced users sometimes overlook this, so remember: preparing wisely leads to smooth repair. Let the area dry out if there’s excess moisture. |
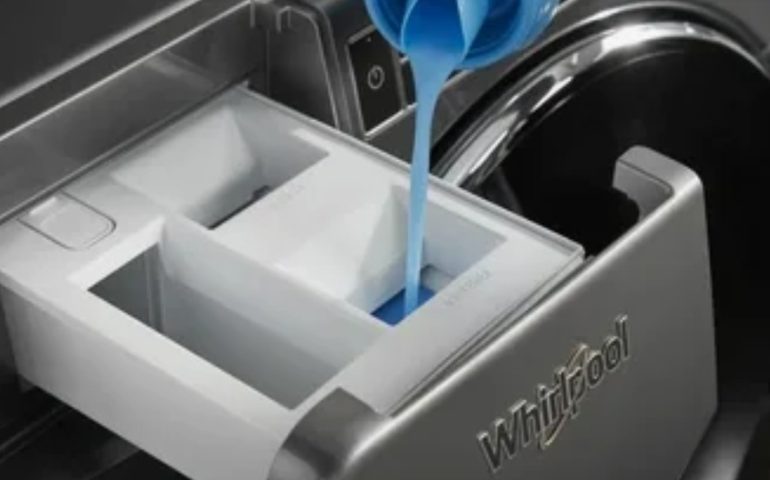
Accessing the Dispenser SectionRevealing the CoreRemove the top or front panel by unscrewing the fasteners. Move methodically. Find the dispenser assembly and inspect its hose. Any bulges, cracks, or blockages signal definite troubles. Take photos as you go for later reference—this helps when reassembling and avoids mistakes. | Removing the Old PartPrecise ExtractionDetach the damaged tube by loosening clamps and gently sliding it off connectors. Some models might offer quick-release fittings, making changes swift. If the Water Hose for Whirlpool Washing Machine is stubborn, gently wiggle while supporting nearby components. Patience here avoids breakage and saves you time during installation. |
Selecting a ReplacementCompatibility and FitWhen searching for a new part, check its material thickness and flexibility. Opt for genuine or high-quality alternatives. This ensures a tight fit and durable performance. Confirm tube length matches the previous one to prevent strain or twists once installed. | Attaching the New TubeCareful InstallationSlide the new piece into place, using the same route as the original. Secure with clamps, making sure there are no kinks or bends. Gently press both ends to ensure a snug connection that won’t leak under pressure. Double-check positioning before closing up panels. |
Testing and CleanupFinal VerificationTurn water and power back on, then run a rinse cycle. Check for drips around dispenser connections. Wipe surfaces clean and replace panels. The process for the Water Hose for Whirlpool Washing Machine is nearly complete at this stage, but running a few cycles in succession offers more peace of mind. | Helpful Tips Moving ForwardMaintenance and LongevityRegularly check your washer for early signs of wear and tear. Address minor hose issues before total failure. Keeping the dispenser area tidy and moisture-free stops future damage. If working with older hoses, consider periodic replacements to maintain optimal machine health. |

Replacing the Water Hose for Whirlpool Washing Machine doesn’t require advanced skills, just careful attention to detail. By following these instructions, you can keep your home running smoothly. Forgetting routine checks often leads to bigger problems, so stay alert to changes in performance.