Installing a kitchen sink can appear overwhelming at first. Many homeowners feel uncertain when considering key aspects like device hookups and pipe connections. Clear planning and a thoughtful approach help transform the task into a manageable sequence of actions. Today, integrating a food waste grinder and a washing assistant into your sink setup is a common project for those updating their kitchen.
Planning Your Configuration
The process starts with organizing all necessary materials and visualizing the final layout. Careful measurement guarantees optimal fit, while attention to utility access and component placement allows smooth installation. Choosing compatible devices makes the plumbing less complicated and minimizes the risk of leaks. Each individual fixture should harmonize with the overall system, ensuring reliable performance.
- Measure the cabinet space under your sink.
- Check compatibility between the waste processor and the mechanical helper.
- Ensure nearby power access points and water stop valves are functioning correctly.
- Plan the route for drainage pipes before assembly.
Step-by-Step Assembly
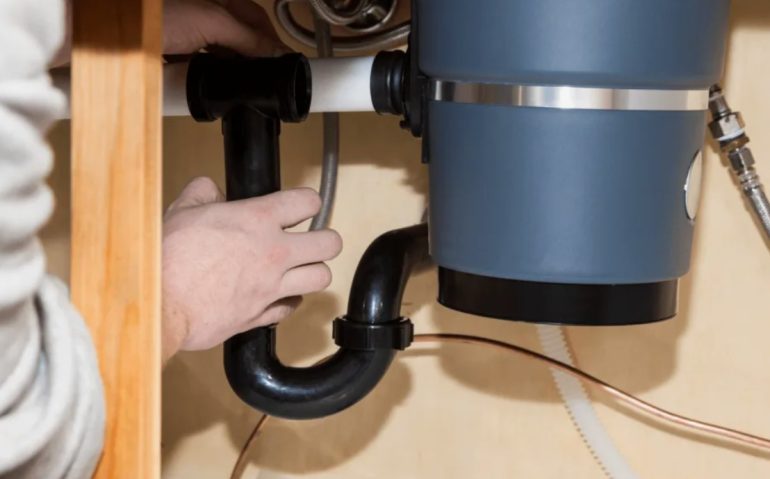
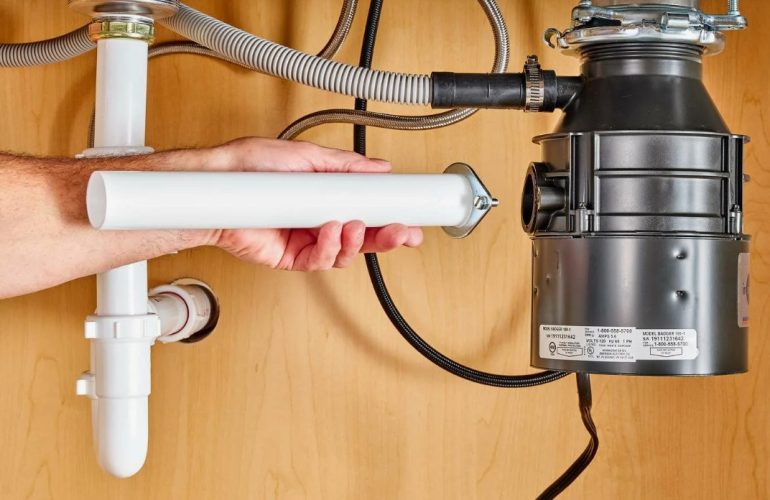
Once you’ve collected all parts, it’s time to start connecting the drain, water supplies, and electrical cords. Begin by laying out each individual unit and matching pipe sections to their respective inputs. Attach the disposal with the correct mounting bracket, making sure its alignment is precise. The dish-cleaning device typically connects to the sink drain above the trap, allowing water and food residue to flow away effectively. Smart use of flexible piping can simplify bending and minimize the chances of tricky blockages.
- Secure the sink flange and gasket tightly.
- Join the unit for breaking down food particles with the mounting ring.
- Connect the dishwasher discharge hose above the waste trap.
- Seal all joints using plumber’s tape to prevent leaks.
Key Installation Tips
Working with water supply lines, choose flexible connectors to absorb vibration and simplify future maintenance. Always ensure hoses and pipes are securely clamped. This reduces the possibility of water escaping. A proper air gap between the sink and kitchen helper prevents dirty water from entering sensitive components. If existing plumbing is old or corroded, replacement during installation is recommended for consistent results. Turn off the circuit breaker before wiring up the waste processor.
Testing and Final Touches
Finally, once everything is assembled, open water valves and observe all connections carefully. Run both devices one after another to check for even flow and drainage. Any minor leaks should be sealed immediately for safe operation. Dispose of packaging and leftover materials responsibly. Read the manufacturer’s instructions to fill in any gaps, as some models provide unique tips for care. Mark down the installation date to help track when routine maintenance or inspections may be needed later.
Whether you’re finishing a kitchen makeover or simply enhancing convenience, incorporating both a grinder and washing assistant streamlines cleanup after meals. The steps involved are straightforward and empower you to tackle repairs or upgrades confidently in your living space. Adding Disposal and Dishwasher transforms the sink area into a hub for efficiency and hygiene, saving time for what matters most.